random.h

random.h is a header only random number generation library for games, image processing and procedural content generation.

A few years back I wrote some handy floating point random number generation routines for a raytracer.  Time and again, I have needed these routines for other programs I have been working on.  It seems like a good idea to wrap them up in a small header and release them in the public domain for others to use too.

Each RNG function takes an 64bit integer as a seed value and permutes it in place.  The resulting bits are used for the generation of the result.  I like this design as it keeps the RNG functions stateless and thread safe.  You just have to keep track of the uint64_t you have been using as your RNG stream.

Included are various 1, 2 and 3 dimentional random number generators with a range of different distributions.

Triangular random noise is very usefull when dithering audio and images during the process of bitdepth conversion.  Typicaly, triangular noise is added to the signal immediately before type casting (at the same magnitude as the LSB of the destination bit depth).

The 2d and 3d vector RNG functions generate statisticaly unbiased vectors inside and on the unit circle or sphere (Generating vectors by randomizing the components and normalizing would bias the vector to the corners of unit cube).  I have used these functions successfully in the past for generating ambient occlusion maps.

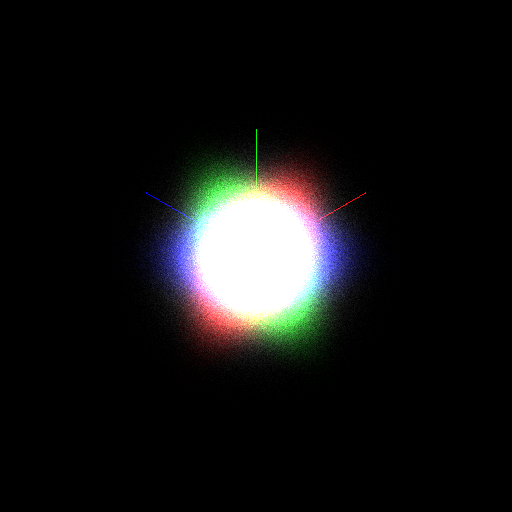
I wrote a little program to generate some images to display the output distribution of each function.  A 3d point is generated by filling its component from the RNG function under test, and the resulting point is projected in space, as well as projected on each component axis (the red, blue and green planes).  Hopefully the images help a little to convey the distribution of each function.

Again, you can find the library here:
random.h

randfu() - unsigned random 
range [0,1]

randfu_2

randfs() - signed random 
range [-1,+1]

randfs_2

trandfs() - triangular random 
range[-1,+1], tends to 0

trandfs_2

grandfs() - gaussian random 
range ~[-1,+1], tends to 0

grandfs_2

vrand3d() - 3d vector random 
magnitude range: [0, 1]

vrand3d_2

nvrand3d() - normalized 3d vector random 
magnitude = 1

nvrand3d_2

vrand2d() - 2d vector random
magnitude range: [0,1]

vrand2d_2

nvrand2d() - normalized 2d vector random
magnitude = 1

nvrand2d_2

Playing with MicroThreads

I recently bought Game Programming Gems 2 and was captivated by an article titled ‘Micro-Threads for Game Object AI’.

A really neat technique is describes that can performing very fast cooperative multitasking, also sometimes referred to as co routines.  The heart of this technique involves manipulating the processor stack pointer to switch between multiple contexts of execution.  Its very similar in concept to true multitasking, however each thread decides when to share the processor.  The concept is simple enough, but really so powerful and radically different from many other techniques for AI I have used.  I knew I would have to program up a text to play with this idea.  Using this method, each object in my game can pretend it is running in its own thread and I am sure this can find application elsewhere too.

The article provides a nice description, but doesn’t provide enough information to directly copy an implementation, and my copy arrived without the CD, but that is fine however and I am having fun of working it out my own.  I have made a few projects in the past which manipulated the CPU registers to perform various tricks, so I can build upon that knowledge.

My first implementation appeared to operate correctly until exit where my call to delete[] threw up an assert.  This is because the fake stack was getting sprayed with bad data somehow from within my virtual thread. I will be spending lots of time in the debugger until I find out the cause.

Update 1:

I believe that the debug run time version of printf() is writing past the end of the 1kb stack, causing a buffer overflow. Hmm….

update 2:

I went back and read the article all over again and there were many hints that I simply didn’t have enough stack space at all.  The author also proposed a very nice improvement, where we effectively extend the stack size by copying each micro thread into much larger stack before execution.  Thus the Micro Thread code can make use of a large stack space, but individually they only take up a small amount of space.  After execution, we extract the smaller part of the stack again.  This places the limitation that _yield() cant be called deep in some code in the thread, but that is hardly a restriction at all.

Here is my demo code for anyone that want to have a look at its implementation.  I wrapped it up with a little API as well so it should be somewhat readable.

microThread.cpp

update 3:

My brain must have been thinking of improvements overnight since I woke up with three ideas I had to experiment with. In each case it was to address the stability and protect against stack overflows. The most major improvement is the use of VirtualProtect(), which is used here to set the bottom of the shared stack region to a guard page. This wastes 4k of stack space, but it is well worth it since now a nice exception is thrown if we write to the stack anywhere in the bottom 4k.

The second improvement, is to check the value of the stack pointer upon return from a micro thread. If it falls within the space allocated to each thread then everything is fine, otherwise we will need to allocate more stack space for that thread. If this check fails, and esp lies outside of our thread space, then we can be sure that we wont be saving all of that threads state during the task switch. That would lead to very very bad things.

A final improvement is to address what happen when the micro thread function returns. Currently, there is no return address on the stack, so execution could jump literally anywhere.
The solution is to ensure that we have a valid address for this function to return to. We can set the return address to a custom function that can handle the situation on one of two ways. We can setup the stack and processor state so that it will execute the micro thread function once more, thus it will feel like our micro thread function is permanently called. Alternatively we can mark that thread as finished, switch back to our main thread, and then kill the micro thread cleanly. Since both options have merit, I will implement both of then and let the user specify the handling during thread creation.

update 4:

I am now playing with Vectored Exception handlers to see if I can recover from stack overflows, and automatically terminate a malfunctioning thread.  I have confirmed that an exception is being thrown when I intentionally overflow the stack from within a micro thread.  It shouldn’t be too hard to switch the context back from within a vectored exception handler.  I remember having played around with something similar, having self modifying code from an exception handler if a debugger is detected.  According to the original article, it states that structured exceptions no longer work correctly from micro threads since no handlers are on the stack, perhaps this is something I can look into addressing also.

update 5:

Here is the latest version of the library provided as a source release.  The vectored exception handler really works amazingly well, terminating any micro thread that attempts to overwrite its stack.  If a micro thread returns from its function, the thread will terminate as well.  There are many more stability improvements and validity check making this quite a viable option for use in any project now.  I have included a small test program also so that the functionality can be demonstrated.

https://www.dropbox.com/s/z0pv24ul3szifsc/microThreads.zip

THUMB Disassembler

I was recently searching through my hard drive looking for examples that might highlight my love of low level programming, and I present here one such project which is a good example of this.

THUMB is an instruction set that was added to some ARM processors as a way to reduce code size, which is advantageous as ARM typically finds use in very constrained devices.  The processor can switch between two operating modes at the request of the program, switching from decoding ARM instructions to smaller THUMB instructions.

I found THUMB particularly interesting since the instruction set is clean and simple and it might make a nice basis for a virtual machine to execute programs written in it.  My idea was to use programs written in C and compile them to THUMB and then execute them in a virtual machine, the entire process serving as a powerfully scripting system for games.

Ultimately, I switched to a MIPS processor as my basis for this project, but I still got as far as making a THUMB disassembler.  I should point out that this was the first disassembler I ever wrote so it marks a large mile stone for me.  Since then I have made a very nice MIPS disassembler using much of what I learned on this project.  The code for the THUMB disassembler can be found here:

thumb_disassm.cpp

To test a disassembler there needs to be something to feed it.  For that purpose, I compiled a small program in GCC targeted for the THUMB instruction set.  The program is listed below, and is just a nonsense program designed only to be valid so as to generate some instructions:

Continue reading

Let the adventures begin

Recently my girlfriend asked me if I would help her program a text adventure.  She has wanted to learn the program in C for a long time and also has been looking for a project we could work on together.  I thought this was an awesome idea, so I set about programming a basic shell of an adventure engine for her to work with.  I wanted to take the load off her so she can focus on developing the story rather then dealing with blitting, messaging, etc.

I managed to pack the entire DOS font of 256 characters in to 3k of space and embed it into the program, which was pretty cool, so each bit encodes only one pixel.  I could perhaps have achieved more using RLE but there really isn’t any need to go that far.

My library emulated a console screen of 40×20 characters.  It has a cursor that can be moved, text and symbols can be written to the screen and it handles user input,  so in short, all of the basics for a text adventure.  There is no scrolling implemented yet however since that didn’t seem necessary.  Conceivably an awesome rogue like could be easily written with this library.

Plain text however just seems too digital and static.  I wanted something more like and old analogue CRT monitor with a little too much interference, and misaligned deflection coils.  So a second achievement was to finally get around to writing my ‘ghetto blur’ as suggested long ago for my yet unnamed dungeon game.  I managed to do this efficiently using some cool tricks, using only ANDs, ORs and shifts.  It looks fairly retro and below you can see it for yourself, however the magic is seeing it animated as it subtly flickers and wobbles.

Image

Shadows and Gradients

Again, I have produced a small demo of the Tengu Engine as my own way of experimenting with what may be possible as it progresses along its development path.  While work is already under way on the hardware renderer, it still has not been integrated into the main code so this demo here still uses SDL for all of the rendering. What it shows is a top down perspective using a destroyed space ship tile set I made recently.  There are ray traced shadows as well as what I refer to as gradients, or distance based mask pattern selection, to give the illusion of light or visibility falloff, which is a technique somewhat similar to dithering I suppose.

Laying Out The Plan

Mocup1

I have been working on some tiles for this project today to help me define a more solid overall look of the game.  The task for today will be to update the engine to support custom maps and these nice tiles.  The water rendering is also coming along so I am hoping I can have these things integrated by tomorrow.

Also, something that I have rarely seen in a platform game is genuine AI companions that can join the player on their journey.  I guess this is in part due to the fact that it can be hard to create an AI that can navigate and jump between platforms properly, however I have devised what could be a great solution to this problem.

The Chaos Engine Remake

I love the Bitmap Brothers, and especially the Chaos Engine (Z is also up there). I have so many fond childhood memories of being at my friends house in front of his Amiga500 getting our asses kicked with that game.

A while ago, I really dedicated myself to remaking The Chaos Engine as best I could. This would be a lesson in sticking with a project, a little longer then just proving a core concept. It would teach me about making the tools used in creation of a computer game. I learned how to program more complex enemy AI then I was used to. An entire engine was also designed and programmed just for this project. i implemented a simple custom scripting language for the game. All blitting operations and audio mixing was also done by hand too. In essence, this was by a long shot the most ambitious project I had ever taken on. Everything is programmed using fixed point math also, there is not a single float used anywhere in the source code. All of the path finding is done using the A* algorithm. Also all the collision checks are optimized by maintaining a quad tree for the entire level.

Below is a video of the project as it was when I finally moved on to work on something else. I don’t feel at all disappointed at having abandoned this project because so much was learned in the process.

One item of note was the players companion AI. That was a very fun challenge to program since it was critical that he should be actually helpful in the game.

At a basic level this character operates by means of a strange state machine and blackboard hybrid. The player can be in only one state at a time. A state can return naturally to another state if it specifies to do so. A state can also at any time be interrupted by a transition to a state of a greater priority.

Each priority level of this AI has an expert associated with it, thus each frame, each expert is contacted to see if it has a plan for the AI. Then the plan of the highest priority is selected as the active pursuit. For this AI there was 6 priorities listed below, highest first.

  • AVOID (avoid enemies and bullets)
  • ENGAGE (find a good attacking position if not in one)
  • SHOOT (fire at the most convenient enemy we can find)
  • CATCHUP (do not stray too far from the player else follow any path we have)
  • RETHINK (find a new path to our destination)
  • PICKUP (collect any coins and bonuses around us)

As you can see from the video, even in this early stage of implementation it already looks quite intelligent at times. The AI sidekick was the last thing I added to the project, but one of my favorite things I have programmed.

I may re-examine some elements of this project later and explore them in more depth since there were many very common programming problems that I found nice solutions too that I would like to share. Also I think I will release all the source code too at some point in the future, as it may be of use to someone else.