Unknown's avatar

Ambient Occlusion

I spent my morning programming a small ambient occlusion generator for height maps and the quality of the output is surprisingly nice.  In the picture below, 2048 random rays are cast from the center of each pixel out towards the hemisphere.  Each pixel represents the ratio between rays that hit other locations of the height maps and those rays that are clear of all other terrain.

Several methods were used to improve the quality.  Again at all stages, I use sub pixel accuracy, using bi-cubic interpolation in all calculations.  Random rays are generated that maintain a strong random distribution over the entire hemisphere.  This is accomplished by setting a rays x and y components to a random value, between -1.0f and 1.0f.  The z component is set to a random value between 0.0f and 1.0f, to ensure it rises out of the terrain.  The statistical trick here is to discard the ray if it has a magnitude > 1.0f, and try to generate another random ray.  Once a ray is found with a magnitude of < 1.0f it can be normalized and then used.  This method was described in “Texturing and Modeling: A procedural Aproach”.

Image

Image

Unknown's avatar

Hydrolic Erosion

I have spent most of today and yesterday trying to simulate a basic form of erosion due to the action of water washing away at the surface of a height map.  To generate convincing, earth like procedural terrains, I really believe this is a phenomenon that needs to be modeled.  I devised and implemented two approaches to model this, the first involving something similar to pressure maps or heat maps, however it was too unstable to be really useful.  The second method is much more simple at its core however unfortunately not as fast as my first method.

I store an array that holds 32768 (2048*16) particles, each initially placed at random across the surface of the height map.  Each particle has a location, a velocity, and also a mass parameter.  Each particle gains an acceleration that guides it down the height map.  This is achieved by sampling the gradient underneath each particle in a process exactly the same method as that which is used to generate normal maps from height maps.  Figure 1 shows the height map and Figure 2 shows the corresponding normal map that can been calculated from it.  I did in fact take things one stage farther and allow the position of each particle to have a sub pixel accuracy so that the gradient can be calculated at sub pixel accuracy too using bicubic interpolation.  As particles run down the height maps, it is inevitable that their motion will cease at some point as they come to rest.  I detect this when the magnitude of their velocity is close to zero, at which point they are given a random location, with a bias towards high areas of the height map providing a weak model of evaporation.  When a critical speed is reached for any particle then it will lift material from its position on the height map and add it to the particles mass parameter.  When a particle lifts material, the height map is written to, again using bicubic interpolation, to reflect the loss of this material.  Figure 3 shows a visualisation of the particle system during simulation.  Particles shown in red are currently moving fast enough to lift material from the height maps surface.  When a particle comes to rest and has been flagged to be moved by the evaporation process, all of the mass that it has accumulated is first deposited at its current resting point.  Since the gradients are recalculated for each particle during its update, these two processes that change the height map will influence particles that later may follow a similar path.  Thus commonly used paths will be eroded, reducing their height gradually.  In figure 4, we can see the process after around 20 seconds of simulation.  Notice that deep eroded paths can be found moving from areas of high elevation to areas of low elevation.  Also notice that initially there was a large black split running through the middle of the map, representing some canyon, or a large river.  The process of erosion has deposited material in this space, raising its height significantly.

The simulation time could be considered significant if this technique was to be embedded in a games level generator, but the results seem initially very encouraging.  There are many parameters to play with however, each giving different results, so much more experimentation in this regard needs to be done.  Another technique that needs to be explored to compliment this work is a method to detect which regions of the map should be submerged by water.  After all, this is not much use unless we can also have nicely animated water in the correct places.


Figure 1.

The height map used in the demonstration.

Image

Figure 2.

A normal map generated from the above height map, demonstrating a method of determining the gradient by taking the vector cross product of tangent and binormal vectors.

Image

Figure 3.

Visualization of the particles in action.  Particles shown in red are moving fast enough to lift material from the terrain.

Image

Figure 4.

The resulting simulation of crude erosion of the height map after around 20 seconds in the simulator.  Notice the deposit of material that begins to fill up the lowest points in the map.

Image


Figure 5.

Here the erosion model is applied to a smooth gradient to observe the effect of many random particles all moving together to create successively larger channels the deeper down the surface they run.

gradient

Unknown's avatar

Voxel Heightmap Rendering

I spent most of yesterday developing and implementing a really unique voxel renderer.  I have so far only heard of ray casting methods for drawing voxel landscapes, but the approach I came up with is radically different.  The performance is really great however, and is comparable to any ray casting approach.  I don’t know whether to keep the algorythm under wraps just now, since I think it could have a lot of potential.

Currently the rendering is only isometric, but it should be possible to modify it for perspective rendering too if I sit down with the math.  There is no pre computation for this method so the height map and terrain texture can all be updated on the fly, opening up lots of amazing possibilities.  Zooming, rotation, and tilting are all free performance wise since they are fundamental parts of the algorithm.  The terrain resolution is also independent from the performance of the algorithm surprisingly, so there is no penalty for a very detailed landscape.

Over the next few days I really want to push this technique and see if I can squeeze more from it.  I have plans to implement ambient occlusion and dynamic hemispheric lighting.  Also dynamic light mapping could be integrated.  The possibilities are really inspiring.

screenshot

Here is an extreme close up where you can see the individual voxels.

closeup

Unknown's avatar

2D Instant Radiosity

Since I am experimenting with my new ray casting code, I decided it might be worth trying to implement a 2D version of the instant radiosity algorithm.  The results are very pretty.

Radiosity

The strategy is really simple.  From the light source, you cast out rays in several directions, and store the intersection points.  In the above capture, there was 64 of these points, but its more reasonable to have less, since there is an big performance penalty the more you have.  The next step is to iterate over all the tiles on the map performing a ray cast from the center of the tile, to each of these initial sample points that we captured.  The percentage of hits we gather determines the brightness of the tile, the more unblocked ray casts then the brighter the tile.  Simple as that.

RadiosityNoiseLow

An unfortunate aspect of the vanilla algorithm is that it produces many noticeable blocky artifact which can be quite off putting to the overall effect.  A solution I propose to this problem is to add jitter into the algorithm.  For each of the ray casts from a tile to one of the irradiance samples we add noise to the position of the irradiance sample.  This noise actually improves the overall accuracy of the algorithm which is a strange phenomenon.  It also looks much more pleasing to the eye in my opinion.

Unknown's avatar

Ray Casting… Again…

Previously I visited a really simple and terrible way to render voxel terrain.  It involved stepping along a ray at uniform intervals, and simply sampling the height map at whichever texel the current point along the ray falls into to.  Its crude, but it works.  I would have liked to use my previous ray casting code to step along each ray, but the algorithm prohibits this.  That is because the old algorithm steps along in the x-axis intervals until it hits something and saves it.  Then it steps along the y-axis intervals until it hits something.  Finally, it takes the real hit point as the closer of the two hit points found.  That is simple and efficient when we only want to know the first intersection point, but useless when we need to step in order through a height map.

To improve the voxel landscape renderer, I needed to write a better raycast algorithm.  A requirement for its intended purpose is that the algorithm will visit each tile of the map in the order in which they are hit.  Something like a straight line algorithm (Bresenham’s) would do this, sure, but I also need to know exactly where each intersection takes place, and extra information on top of that, so a better solution had to be found.

I also should point out that I took every opportunity to ensure that this ray-cast method wouldn’t be only applicable to voxel landscape rendering.  It can be used in exactly the same fashion as my previous ray-caster, only this one should be more robust, and has a few nice additional properties.

It can return the exact tile that was hit, the exact location of the intersection and a code representing the side of the tile that was hit.  Also I needed to ensure that a hit would not be registered from the tile that the origin lies in.  This requirement is for other uses, such as light mapping, and radiosity calculations.  A demo I badly want to make would be 2D a radiosity light mapper using a photon vomiting approach.  Therefore I needed to ensure that I can find a normal ray intersection point, and later compute a reflected ray around that point, to simulate light bounce.  An issue I worried about and previously had trouble with was when the origin of a ray lies essentially touching a blocking tile.  This is an issue I hope has been resolved now.

Image

The above image was generated in a stress test for the new algorythm where all rays are traced from the origin radiating out evenly in a circle.  In this case the origin is obviously the blue circle.  Lines are then drawn from the origin to the intersection points, which gives the appearance of a light source when a sufficient number of rays are used.  The stress test shows that the algorithm appears stable at all angles of ray, and was fast even when spitting out > 500 rays.  The new algorithm can be found below, but please give me some credit if you use it for anything.

RayCast.cpp

Unknown's avatar

Everyone Loves Voxels

voxels

Since voxels seem to be all the rage these days I feel like I may as well join in too since I don’t want to miss out on all the fun.  While I have been learning about procedural generation and noise functions, I realized that I also needed a way to visualize height fields somewhat more intuitively then just drawing a 2D top down projection.  I decided to explore the illusive technique of software rendered voxel landscapes,  not the minecraft type of voxel which uses octal trees to store a true 3D representation.  Most of these octal tree voxel techniques convert each voxel into a 3D polygonal representation so that the graphics card can render it quickly.  This method seems a little more pure then that, since its all voxel and all software.  The basis of this method is really just an extension of the ray-cast that I have explored before, but in actual fact I implemented a horribly naive ray-cast for this quick demo for the sake of simplicity.  A great tutorial covering the entire technique is best found here:

http://www.flipcode.com/voxtut/

Unknown's avatar

Property Grids in C++

During my experience writing an editor for my Chaos Engine remake I fell in love with C#’s property grid since it is like the ultimate Swiss army knife of data manipulation.  The property grid can be seen below:

Property Grid

From my understanding, you send the property grid a structure, it accesses C#’s internal representation of that structure and makes all of its members available for manipulation in their native data types.  Even things such as enums are correctly handled, and alone it can form the greater part of a powerful level editor.

My current focus is the re-implementation of something similar in C++, which will form one of the cornerstones of my level editor.  Since there is no way to ask C++ what the layout of a structure is, I need to give this information to my property grid in addition to a pointer to the structure to be modified.  These representations can be programmed at compile time and included in the static data section, and the beauty is that we can use the same representation for all objects of the same type.  As always, I like to make a mockup before I start to program so that I can first focus 100% on the visual layouts, and then later focus 100% on the programming side of things.  If I were to do both at the same time the final design may be unfocussed and rushed.  My mockup is designed to match the scripting art for nice consistency.  I hope to have this finished in the next few days.

Editor

Unknown's avatar

Deeper Into The Dungeon

There hasn’t been much visually to show of my latest developments despite constant progress.

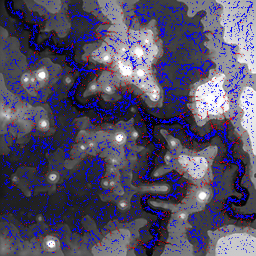
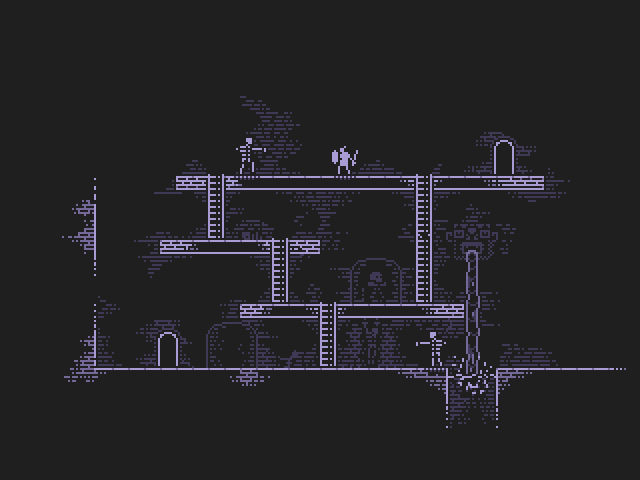
I showed my game on the TIGSource forums where I accidentally posted a scaled image of Dungeon Trap, however, many people seemed to like the “Ghetto Blur” as it was referred to that came from the scaling.  I began playing around with some methods to achieve something more intentional, reminiscent of a really misaligned old monitor.

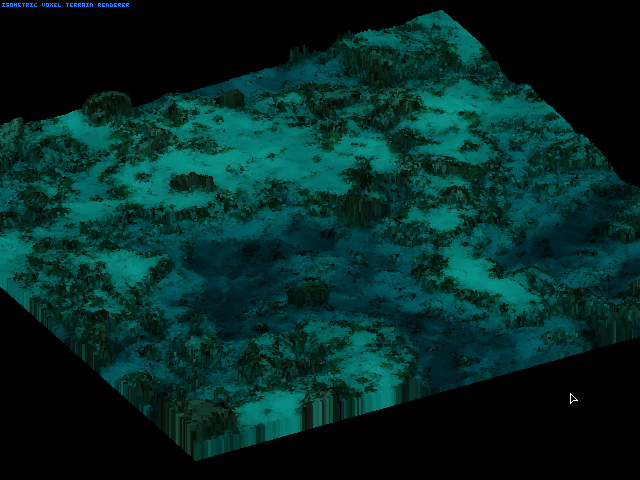
My preferred method of rendering in the Tengu engine is to draw the game to an off screen buffer at 1:1 size, and then perform a very fast scaled Blit to the screen to blow this up to 2x to 4x the size.  At this stage I could also apply a dirty filter to mess with the colours, effectively offsetting each of the colour channels a little.  A mockup of this effect can be seen below:

GhettoBlur

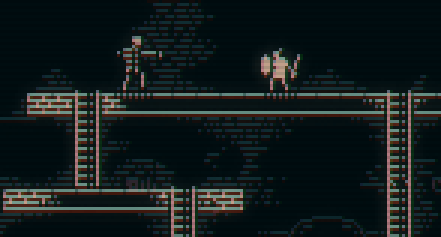
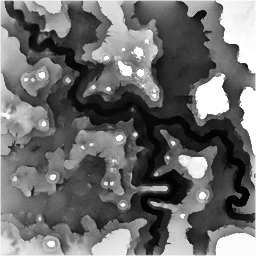
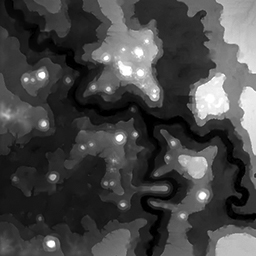
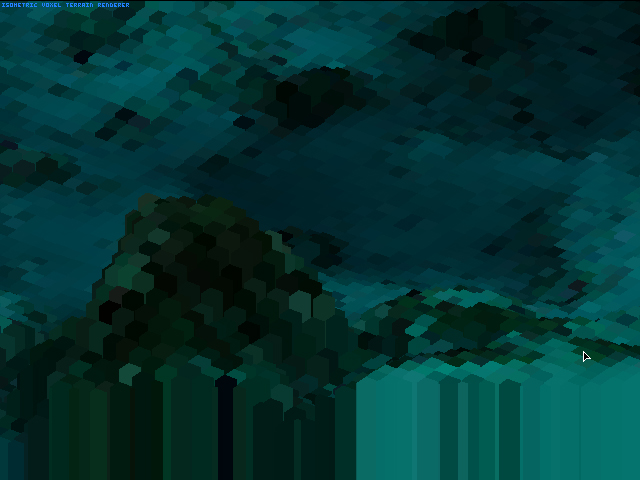
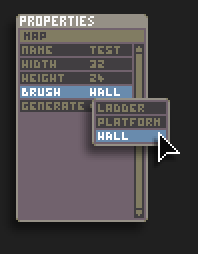
Also I realized that I really want to commit to using procedural art generation in the level creation process.  The basis of each level is really just the position of the ladders, floor tiles and dynamic entities.  If you look at the mockup from the previous entry you can see that most of the fluff in the background is a regular pattern, distributed semi randomly, tending to hug the ladders and floor tiles.  This could be generated procedurally instead of the normal method of creating a limited set of pre-made tiles that are to be placed by hand during the levels creation.  The same applies to the pattern inside of the floor tiles, that is also a good candidate for being generated procedurally.  Eventually I want to be in a stage where I can just place two tiles, one to signify floor position and one to signify a ladder, then at the press of a button I can have the procedural algorithms kick in to generate all the required tiles to form a unique and complete map.  All that would be left for the designer is to place the entities and finally script the level.

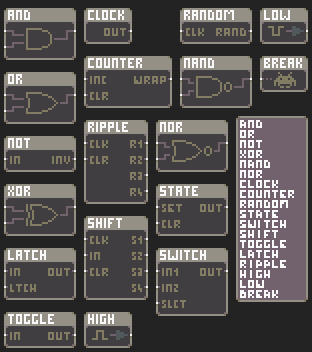
On the subject of scripting, I have spent one hell of a lot of time designing a really unique and what I hope will be a fun scripting system that was born from my studies of digital logic design.  My plan is something like this; every entity in the world can have a variable number of virtual inputs and outputs, inputs being things that will effect the entity, and outputs being products of the entities internal state.  The signals that these inputs and outputs process will be purely binary however, just high and low states.  For instance a lever in the game will output HIGH when it is pulled to the right, and LOW when it is pulled to the left.  It could be linked to the input of a door which will open when that input is HIGH and close when that input is LOW.  With one link, the lever now control the door in a natural way.  With the addition of standard logic gates, some very complex interactions can be scripted between entities.  The beauty is that digital logic at a basic level can be extremely intuitive and a bonus would be that no script programming would required, however the complexity of the scripted events could be pushed as far as you want; Theoretically, an entire computer could be simulated from a digital logic design in the level.

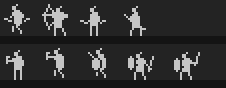
For this to work however the scripts must be easy to make and edit, so I have been working on a visual editor as an extension to the level editor.  Here is the visual design for each of the in build logic gates for the scripting system, left side shows the inputs and right side the outputs.

ScriptSystem

These two areas will be my main focus for the foreseeable future, the level editor and the scripting system.  Other minor plans are to integrate the level editor as part of the game itself, allowing fast design and play test turn around, and to encourage user level creation.  One of my goals is to allow entire levels to be output as small encoded text strings that could be shared on any website or by any standard means.  The only other game I know that had this feature was N, by metanet software.

Unknown's avatar

Dungeon Trap

Dungeon

As I started to think about this dungeon generator it got me thinking more and more about the possibilities of procedural game generation.  I wondered what would happen if a similar technique was applied to generate the levels for a platform / dungeon crawl hybrid game of sorts.  I can envision controls similar to Flashback and Abes Odyssey where the player can only move one grid unit at a time, using some set jump actions and movements to navigate the world.  I made a mockup for this, which I have given the codename DungeonTrap, which can be seen above.  The pixel art above only uses 4 colours, which is a modified version of the original game boy palette.  I a large chunk of the animations already made, a few of which for the player can be seen below.

Image

I had original planned to make only 1bit graphics, so only black or white, but my girlfriend was critical and suggested that it needed more depth.  Unfortunately, some aspects of the games visuals and animations that I can imagine can be shown in a static screen shot alone so until an interactive demo has been made, they must remain in my head.  I plan however to make use of all the previous programming work I have done to experiment with dynamic lights, so that the player can carry around a torch and also integrate light as a fundamental tool of the player into the game-play.